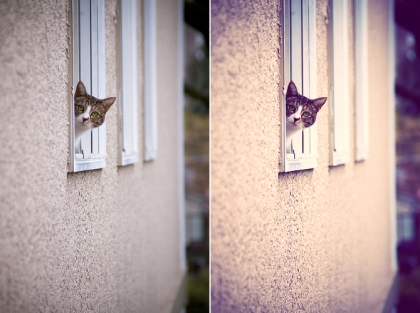
Adobe Photoshop steps in again to help you get that cross-processed look on your images and photographs. Simply put, what you want to achieve, is what traditional dark-room techniques achieve when slide film chemicals are used to process print film, and vice versa. Check out this wiki link to learn more on that.
What I found works best I actually came upon on a Flickr tutorial. A quick google search for “getting that cross-processed effect” lead me through several links and eventually Flickr was where I hit the jack pot. It was titled “Vintage Film effect,” but I’ve heard some people refer to cross-processed images that way because it does look somewhat like old film. I will sum up what I think about the steps found in the tutorial, but click here to download the PDF that I found on Flickr. Also, be sure to check out the Photoshop Action so kindly included for us on the Flickr tutorial page.
First off, this tutorial is brilliant. By using adjustment layers in the tutorial, the instruction is simultaneously transforming your photograph while teaching you the power of adjustment layers. Now the experienced Photoshoper has known that adjustment layers are terrific for a long time, it’s a banal detail, but to all who don’t be certain to take in and really sop up the info the tutorial has to offer.
Next the tutorial spirals you through the intimidating world that is the Curves interface. Within this panel you can stretch and compress tones at will, selectively by colour channel, or with all colour channels selected, as well as do many, many other things. I could go on about what those other things are, but instead I’ll recommend that you visit this link on Curves to learn more on that. At any rate, I like the integration of this Curves step because it gives less experienced Photoshopers a chance to learn something new.
The rest of the tutorial involves setting a low opacity layer of solid magenta over your other layers, and flattening the image; a simple step, and just as such, it is simply effective. Playing with the opacity of the final Magenta color cast layer may be something to look at. I’ve set the procedure up into three actions: labeled Hi, Med, Lo, which finish with 22%, 17%, and 9% opacity, respectively, on the Magenta color cast layer. It works. you’ll flatten your image and you’ll love it.
I encourage you to post your results!


